Control a Ragdoll Together Obstacle Clear Guide
Monkey bars, rock walls, spikes, hammers, and meteors—solved with teamwork.
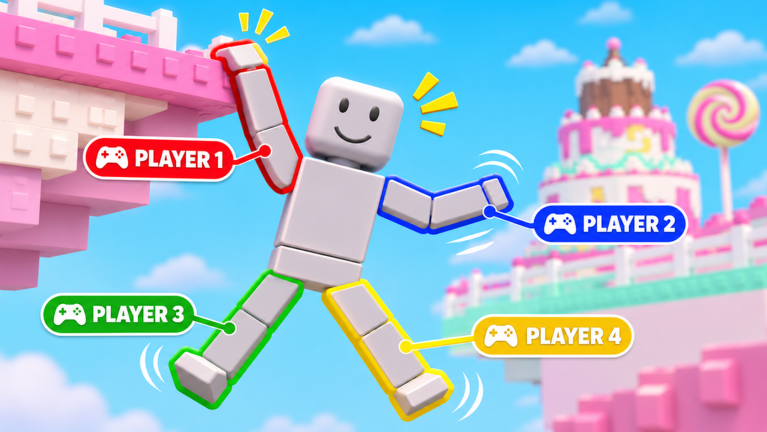
Every memorable wipe in Control a Ragdoll Together! comes from a short list of signature hazards: monkey bars, rock walls, spikes, hammers, and falling meteors. Because one to four players share a single ragdoll, clearing them is a choreography problem, not a gear check. This guide breaks each obstacle into roles, counts, and recovery tips. Use it with the worlds walkthrough for campaign context and co-op tips for callout language.
Shared rules before any hazard
- One caller, everyone else follows.
- Neutral limbs stay neutral—extra wiggles become blame evidence.
- Scout a full hazard cycle from the last checkpoint.
- After a fail, read the whose-fault highlight, adjust one variable, then retry.
- Prefer the seating advice on the tier list when a room clearly favors arms or legs.
Monkey bars
Goal: Swing or hand-travel across gaps without peeling off mid-rung.
Limb plan:
- Arms lead latch and release.
- Legs brace for the landing platform; avoid kicking during the swing.
- Torso/head (if available) only micro-leans to keep the body square.
Count example: “Arms tap—hold—release on go. Legs ready for land. 3-2-1 go.”
Common fails: Desynced releases, sideways yank from one arm, legs jumping early. If blame flags an arm, slow the taps; if it flags a leg, ban jumps until shoes touch wood again.
Practice: Repeat a short bar segment five times without advancing. Consistency beats heroic stretches.
Rock walls
Goal: Alternate holds and footholds so the puppet creeps upward instead of peeling backward.
Limb plan:
- Arms claim holds on the caller’s “reach.”
- Legs push on “step” only when a foothold is free.
- Never move opposite limbs on the same beat unless the caller demands a sync shove.
Count example: “Reach. Step. Reach. Step.” Keep the metronome audible in voice or typed once before the climb.
Common fails: Both arms pulling while feet float; over-leaning camera so someone inputs the wrong direction. Reset to a stable hold rather than panic-climbing.
Mobile note: Legs on mobile, arms on PC often feels best for wall rooms—see controls.
Spikes
Goal: Cross damage floors or corridors with precise foot placement and patience.
Limb plan:
- Legs own cadence and pauses on safe tiles.
- Arms stay quiet unless a balance prop exists.
- Spotter calls the next safe tile color or pattern early.
Count example: “Slow steps. Pause. Pause. Go.” Silence is success.
Common fails: Nervous jump spam, arm flails that tip the center of mass, rushing after a near miss. The blame UI loves noisy legs here—own the lesson and slow down.
Party size: Duos can clear spikes cleanly; fours must explicitly bench unused arms so nobody “helps.”
Hammers and crushers
Goal: Pass through a moving strike window without clipping the head or torso hitbox.
Limb plan:
- Designate a lead limb (often a leg) for the dash or hop.
- Trailing limbs copy only if told; default is hold.
- Arms prepare a grab only when a post-hammer ledge exists.
Count example: Watch two full swings. “On the third upswing—3-2-1 go.”
Common fails: Leaving on the downswing, revenge-running immediately after a clip, two callers overlapping counts. If you wipe twice, swap who calls before you swap who dashes.
Mindset: Hammers punish ego. The safe window is usually wider than panicked players believe once they actually watch it.
Falling meteors
Goal: Strafe or advance under a rain of projectiles without walking into a freshly broken path.
Limb plan:
- Legs handle lateral dodges.
- Arms idle unless a meteor destroys a bridge and a grab save is required.
- Spotter calls direction (“left”) before the shadow hits.
Count example: “Shadows left—strafe left on go. Hold arms. Go.”
Common fails: Everyone strafes different directions, jump panic into a meteor, stopping on a cracked tile that collapses a beat later. Rehearse a single default: “always first strafe left unless spotter overrides.”
Ember Core note: Late worlds stack meteors with other traps. Solve one layer per attempt; do not invent three new plans mid-air.
Multi-hazard rooms
When bars feed into spikes or hammers feed into meteors:
- Split the room into segments at visual landmarks.
- Clear segment one, freeze, restate segment two.
- Reseat only if the next segment changes the valuable limb type.
- Keep Getting Started energy—checkpoints are there so you can bank segment wins.
Solo adaptations
Solo players must sequence limbs mentally: set arms, then legs, or alternate in tiny bursts. Use longer scouting times and accept slower clears. Macro goals from the players hub still apply—short sessions beat marathon tilt.
After you master the five
Record which hazard still flags your limb most often. Drill only that one for a night. Ignore fake power fantasy shortcuts on scripts and keep an eye on updates if a patch retunes timings. Real improvement is boring repetition plus kinder callouts—and that is exactly how stacks finish Ember Core.
Frequently Asked Questions
Quick answers to the most common questions.
Which obstacle should we practice first?
Monkey bars and basic spikes. They teach release sync and cadence before hammers and meteors stack pressure.
What if arms and legs disagree mid-hazard?
Freeze, return to the last checkpoint plan, and let one caller restate the count. Never freestyle a compromise mid-swing.
Do meteors always require strafing?
Usually yes for direct rains. Sometimes the correct play is a short hold on a safe tile—scout the cycle before moving.
How do we use the blame system on obstacles?
Identify which limb broke the plan, change only that input rule, then retry. Avoid rewriting the entire strategy every wipe.
Can four players clear spikes better than two?
Only if extra players stay neutral. Extra inputs often hurt; assign silence on purpose.